
Choose a smart switch based on the wiring behind the wall, not just whether it fits the switch box. For smart switch wiring in Picton, check that the circuit has the conductors the device needs, that its configuration matches the existing switches, and that it supports how the lights are controlled. Some smart switches require a neutral wire, while others are designed to work without one.
A smart switch may look like a direct replacement for a regular switch, but compatibility depends on the existing wiring and circuit arrangement. The wrong device may not work as intended. This guide explains how smart switches control lighting, what to consider when assessing existing wiring, and how to select a compatible switch for single-location or multi-location control.
You’ll also learn how Ontario installation requirements apply and when electrical expertise matters. These checks can help you choose carefully before work begins and recognize when a professional assessment is the safer next step.
Key Takeaways
- Identify the line, load, ground and neutral conductors before choosing a switch; wire colour alone isn’t enough to establish compatibility.
- Match the switch’s neutral-wire requirements and gang configuration to the existing box and circuit.
- For multi-location lighting, choose a switch designed for the circuit arrangement already in place.
- Ontario installation work must account for applicable Electrical Safety Code requirements, including equipment approval and safe wiring connections.
- If the wiring or circuit layout is unclear, have an electrician assess it before installation.
How does a smart switch work?
A smart switch controls a light through an electrical circuit, and its electronic controls need compatible wiring. Incorrect connections can create shock or fire hazards and damage the switch or connected fixture. Power must be off at the fuse box before wiring is examined.
-
Identify Line, Load, Ground, and Neutral Wires
Have the circuit conductors identified before selecting or connecting a smart switch. The line wire brings power from the supply to the switch; the load wire carries power onward to the light fixture. Ground provides a bonding path, while neutral completes the circuit back to the power source. Neutral is typically white, but colour alone doesn’t confirm a wire’s function.
- Use a non-contact voltage tester as part of a proper wiring assessment, and keep power off while conductors are examined.
- Don’t guess which wire is line or load from its position or colour; identify its role before making connections.
Homes built before the 1980s commonly lack a neutral wire or ground wire. That makes checking the actual conductors in the wall box important, rather than assuming the wiring matches a newer installation.
-
Assess Neutral-Wire Compatibility
Check whether the smart switch requires a neutral wire and whether the wall box has one. Many smart switches need neutral to power their electronic functions. Models designed for boxes without neutral may suit compatible circuits. A device won’t be suitable simply because it fits the opening if the required conductor is missing.
- Read the switch’s wiring diagram and note whether it calls for neutral, line, load, and ground connections.
- For a box without neutral, choose only a switch specifically designed to work without one.
Homes built before 1985 should be checked for neutral and ground wires. These age ranges are prompts to inspect the box, not a way to determine its wiring without assessment. If the conductor arrangement is unclear, stop before connecting the device.
-
Understand the Neutral Wire’s Function
Understand the neutral wire’s function before treating it as an optional spare. It completes the electrical circuit and carries current back to the power source. A smart switch that requires neutral uses it as part of its operating circuit, even though a conventional light switch may not use neutral at the switch location.
- Match the switch’s neutral terminal to the neutral conductor only when the device’s diagram calls for that connection.
- Never substitute the ground wire for neutral; they have different functions in the circuit.
For smart switch wiring in Picton, the practical choice depends on the conductors present and the switch’s design. Confirm the circuit arrangement before installation, and leave uncertain wiring untouched until it can be assessed safely.
Ontario Electrical Safety Code rules for smart switch installation
For a smart light switch in Ontario, plan around power isolation, suitable equipment, secure connections, and applicable Ontario Electrical Safety Code requirements. Consider these steps before testing wall-switch, remote, or app operation.
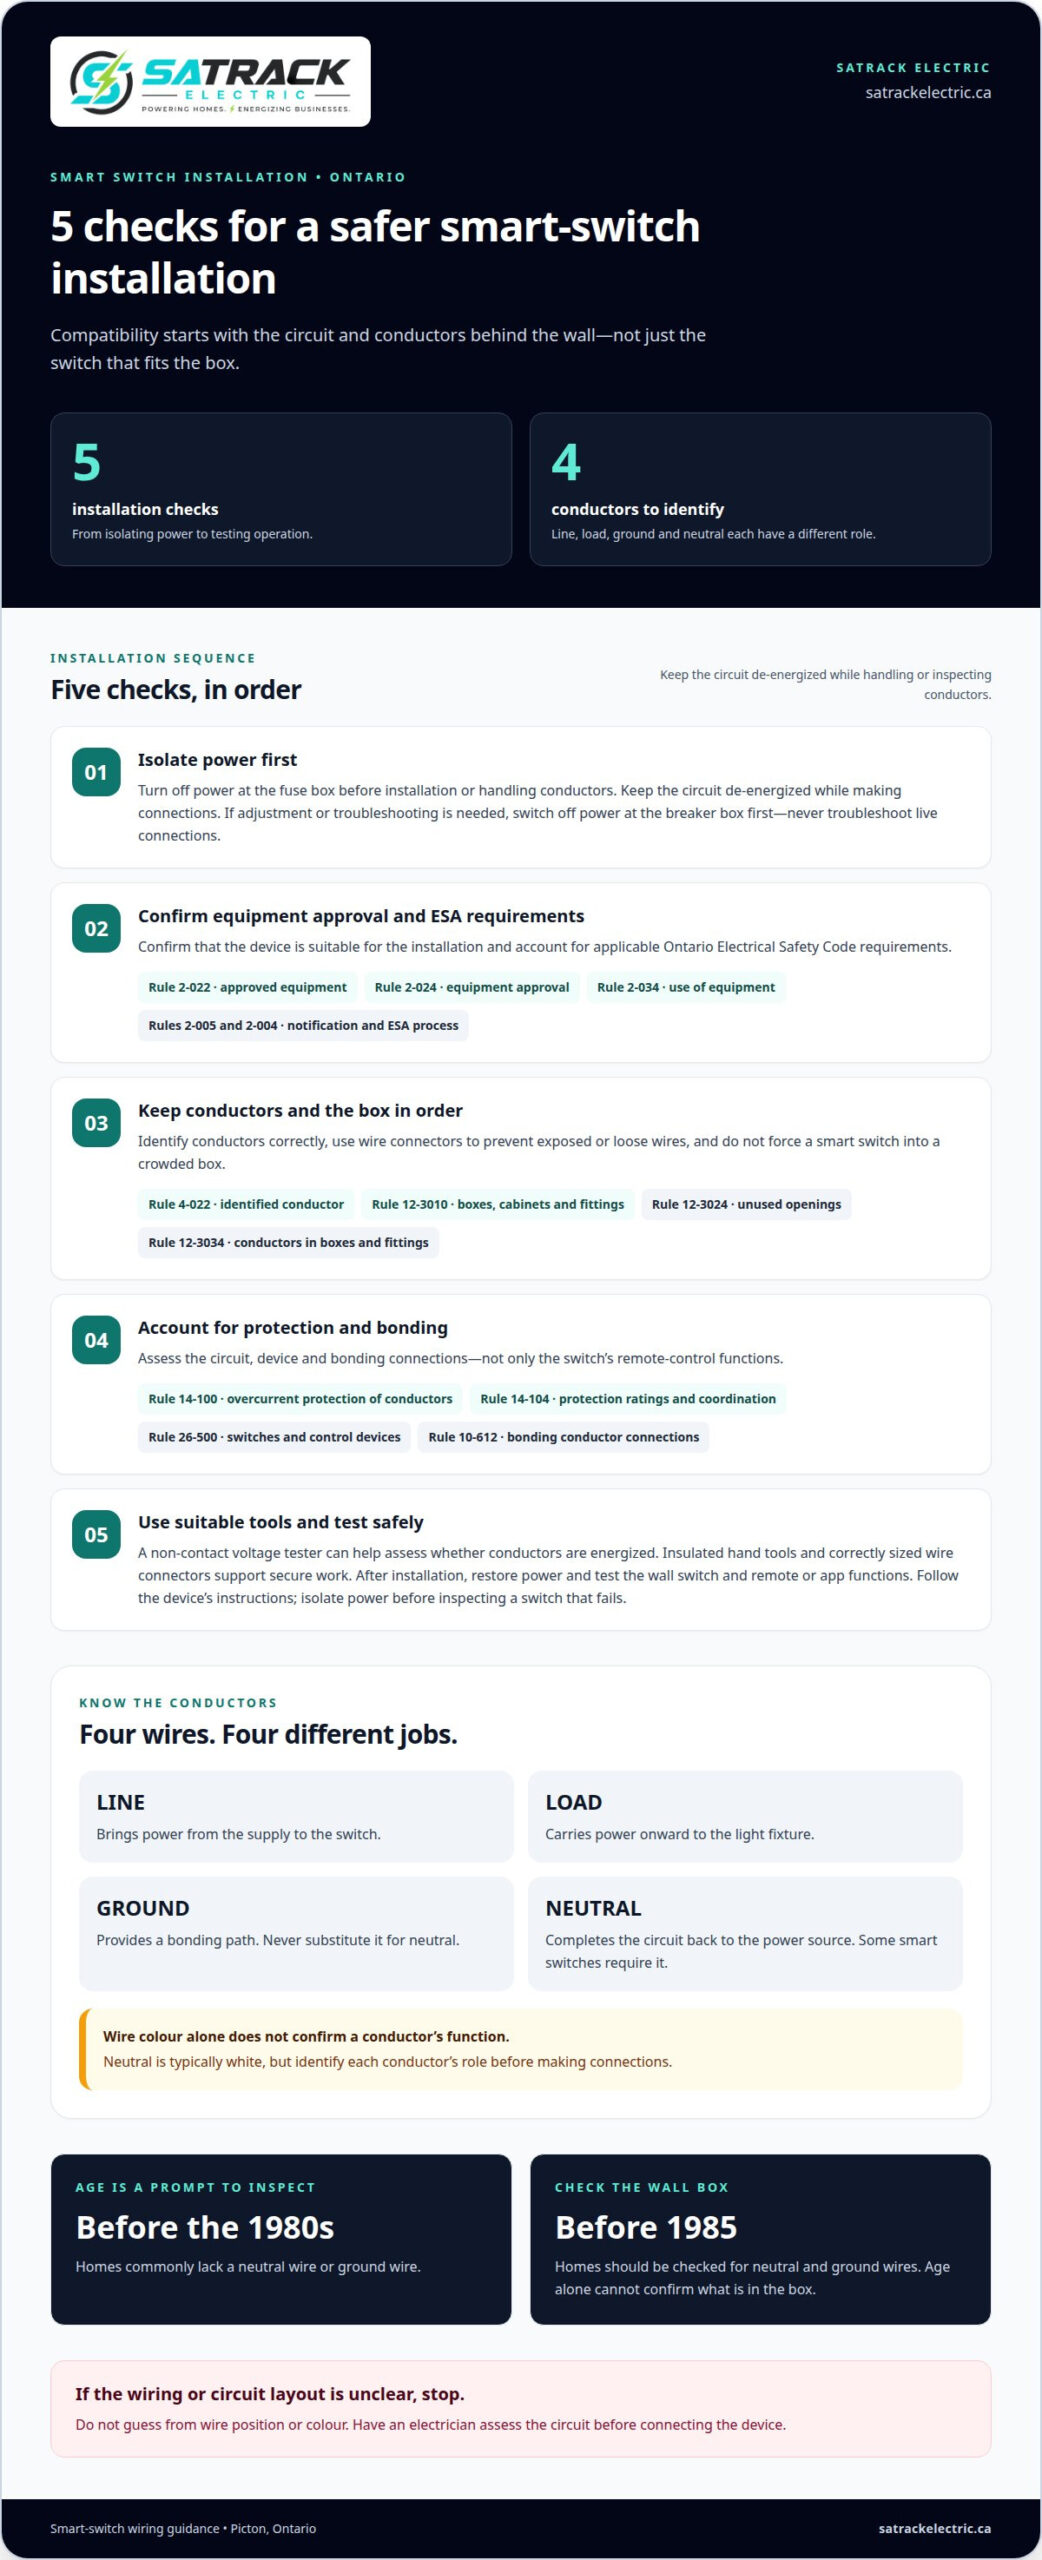
- Isolate power first. Turn off power at the fuse box before installation or handling conductors. Keep the circuit de-energized while removing the wall switch and making connections. If a newly installed switch won’t turn on, switch off power at the breaker box before adjusting wires. Don’t troubleshoot live connections.
- Check equipment approval and the ESA process. Ontario installations may need to meet Code Rule 2-022 on approved electrical equipment, Rule 2-024 on electrical equipment approval requirements, and Rule 2-034 on the use of electrical equipment. Rules 2-005 and 2-004 may also apply to notification requirements and the ESA process. Confirm the device is suitable for the installation.
- Keep wiring and the box in order. Rule 4-022 concerns the identified conductor at control locations. Rule 12-3010 addresses boxes, cabinets, and fittings; Rule 12-3024 covers unused openings in boxes and fittings; and Rule 12-3034 applies to conductors in outlet boxes, device boxes, and fittings. Use wire connectors to prevent exposed or loose wires, and avoid forcing a smart switch into a crowded box.
- Account for protection and bonding. Rule 14-100 addresses overcurrent protection of conductors, while Rule 14-104 covers overcurrent protection ratings and coordination. Rule 26-500 concerns switches and control devices, and Rule 10-612 covers equipment bonding conductor connections. These requirements make the circuit, device, and bonding connections part of the installation assessment, not just the switch’s remote-control functions.
- Use suitable tools and testing methods. A non-contact voltage tester can help assess whether conductors are energized; insulated hand tools and correctly sized wire connectors support secure work. After installation, restore power and test the wall switch and the device’s remote or app functions. For a Rithum Smart Switch, follow the instructions for that model, including its connection and setup sequence. If the switch fails, isolate power before inspecting it again.
If safe installation or testing requires professional help, arrange electrical installation support before working on the circuit.
Choosing a compatible smart switch
Choose a device that matches the wiring requirements and control features of the existing light circuit. Use these steps to narrow your options before installation.
- Confirm the circuit arrangement. A regular light switch can often be replaced, but compatibility depends on the existing circuit. Determine whether one wall switch controls the light or whether multiple locations are involved. For example, a switch designed for a single-location circuit may not support multi-location control.
- Match the required conductors. Compare the switch’s wiring diagram with the conductors in the wall box. Some smart switches require neutral, while models designed for boxes without it are also available. Don’t choose by appearance alone; the device’s stated wiring requirements must suit the circuit.
- Select the right gang configuration. Match the switch’s gang configuration to the number of switches in the existing setup. One switch calls for a single-gang setup, two switches for a two-gang setup, and three switches for a three-gang setup. This helps the device fit the wall’s control arrangement.
- Check multi-location support. If more than one switch controls the same lights, confirm that the smart switch supports three-way or other multi-location operation. The device and wiring method must suit the existing circuit. Don’t assume a switch designed for one control point will work with multiple switches.
- Match dimming to the bulbs. If you need dimming, the light bulbs must be dimmable. Check the bulb type and the smart switch instructions together before choosing a device. For example, a dimming-capable switch won’t provide the intended function with non-dimmable bulbs.
- Consider how you’ll control the lights. Decide whether wall control is enough or whether remote control through an app matters. A compatible smart switch may connect through its app to Wi-Fi and a smart home hub, including Google Home or Alexa. Check the device’s setup requirements against your home network.
- Review network requirements before buying. Many smart switches don’t support 5GHz Wi-Fi, so setup may require a phone connected to a 2.4GHz Wi-Fi network. Confirm the switch’s connection requirements and account for them in your smart home setup. This prevents choosing a device whose control features don’t suit your intended use.
Checking the existing wiring
Assess each wall box and lighting circuit before selecting or installing a smart switch. These steps help determine whether the wiring suits the device and how the lights are controlled.
- Check each location separately. Examine every switch location involved in the project. Wiring can differ from room to room, even when switches look alike. For example, a hallway switch and a bedroom switch may control different circuit arrangements. Don’t assume findings from one wall box apply to another.
- Record how the lights are controlled. Note whether one wall switch operates the light or whether switches at multiple locations control the same fixture. This matters because the smart switch must support the existing circuit arrangement. For example, two switches controlling one set of lights need a suitable multi-location solution.
- Isolate power before inspection. Turn off power at the fuse box before opening a switch box or handling its conductors. Use a non-contact voltage tester to check wiring, following the tester’s instructions. Don’t touch exposed conductors or assume the circuit is safe just because the light is off.
- Look for the conductors the device requires. Compare the wall-box wiring with the smart switch’s diagram. Check whether the required line, load, ground, and neutral connections are present. Neutral is typically white, but colour alone doesn’t confirm its role. If you can’t identify the conductors confidently, stop rather than guess.
- Check the box and available space. Note how many switches share the box and whether the selected device can fit alongside the existing wiring. A two-switch arrangement, for example, needs a device configuration suited to that layout. Don’t force a smart switch or its conductors into a crowded box.
- Compare findings with the installation instructions. Check the device’s wiring diagram against the circuit arrangement, conductor requirements, and number of control locations. Many smart switches support three-way or multi-location switching, but the device and wiring method must match the existing circuit. App or voice-assistant features don’t establish electrical compatibility.
- Decide whether the existing wiring can be adapted. In many cases, existing wiring can be adapted without a rewire. The deciding factors include the conductors in the box, the circuit layout, and the device requirements. If they don’t align or the wiring remains unclear, have an electrician assess the installation before proceeding.
When must an electrician install or replace a smart switch in Picton?
Use the wiring and circuit condition to decide whether to stop and bring in an electrician. If you’re unsure about the wiring or electrical work, choose a professional assessment rather than guessing at a connection.
- Stop if you can’t identify the conductors. A smart switch connection depends on matching the circuit conductors to the device terminals. If you can’t distinguish line, load, ground, or neutral, don’t proceed based on colour or position alone. An electrician can assess the switch box and determine whether the device suits the wiring.
- Get help when the required neutral is absent. If the smart switch instructions call for neutral and the wall box has none, don’t connect another conductor in its place. A switch designed for a box without neutral may be suitable, but its requirements still need to match the circuit. Have an electrician assess the available wiring and device fit.
- Bring in an electrician for multi-location circuits you can’t match. If more than one wall switch controls the same lights, the smart switch and wiring method must support that arrangement. Stop if the device instructions don’t clearly match the existing setup. Incorrect assumptions about a second control point can leave the lighting or smart control inoperative.
- Don’t continue if installation or testing raises a concern. If a new switch won’t turn on, isolate power at the breaker box before adjusting any wires. If the switch still fails or the connection is unclear, leave the circuit off and arrange professional troubleshooting. Don’t repeatedly restore power or handle conductors while the circuit is energized.
- Choose professional installation if you lack confidence. Smart switch installation involves electrical connections, device instructions, and compatibility with the existing circuit. If you’re uncertain about any of these steps, hiring an electrician is the sensible choice, particularly when several switches or lighting points are part of the project.
For an unclear circuit, failed switch, or installation that you’re not comfortable completing, arrange professional electrical installation before proceeding. An electrician can assess the wiring, determine whether the selected switch fits, and complete the work without relying on guesswork.
Satrack Electric: Hot tub and spa wiring
Satrack Electric provides hot tub and spa wiring for residential and commercial properties. If your project extends beyond a wall switch to hot tub or spa wiring, the work needs planning around the equipment and its electrical connection. Satrack Electric also handles residential and commercial electrical repairs when an electrical issue needs attention as part of a broader project. For smart switch work, the key next step is assessing the device, wiring, and circuit arrangement before installation.
Contact Satrack Electric to discuss hot tub or spa wiring or an electrical repair for your property.
Plan your next lighting upgrade with confidence
A smart switch is one part of a connected home. The next step is making sure the electrical work suits your plans for the space. If you’re considering smart switch wiring in Picton, bring the device details and your lighting goals into the conversation before installation. This helps define the project, whether you’re updating one room or planning changes across a property in Picton, Belleville, Trenton, Brighton, Quinte West, Greater Napanee, or Cobourg.
Satrack Electric provides residential and commercial electrical services, including electrical repairs. For help with a smart switch project, contact Satrack Electric about smart switch installation. A clear discussion of the intended controls and lighting setup can help you move forward with a practical plan.
With suitable electrical support, you can move toward lighting that works for your space and routine. For homeowners pairing electrical updates with wider garage or workshop cleanouts, clearing unused property can help free up both room and renovation funds—much like how property owners managing assets south of the border rely on Cash For Junk Cars Michigan to remove unwanted vehicles.
Frequently Asked Questions
How Do I Know if I Need a One-Pole Switch or a Three-Way Switch?
Use a one-pole switch when one switch location controls the light, and a three-way arrangement when two locations control it. A stairway light operated from the top and bottom, for example, has control points at both ends. Before choosing a smart replacement, note how many switches operate the same lighting. The device and its wiring method need to support that existing arrangement.
What Does The Neutral Wire Do?
A neutral wire provides the return path that completes an electrical circuit. In a smart switch setup, it can power the switch’s electronic functions while it controls a light. This is why a device requiring neutral won’t suit every wall box. Check the switch’s wiring diagram before selecting it, and don’t treat the ground conductor as a substitute for neutral.
What types of smart switches work with common wiring in Picton, Ontario?
Choose between smart switches that require neutral and models designed to work without it. Then match the device to the circuit: one control location differs from a three-way setup with two switches. For dimming, the bulbs must also be dimmable. In an older Picton home, check the actual wall-box wiring rather than choosing based on the home’s age alone.
How can I identify line, load, neutral, and ground wires in a light switch box?
Have conductors identified by function, not colour or position. A non-contact voltage tester can help assess wiring, but identifying line and load requires care and the correct testing method. Neutral is typically white, while the ground conductor serves a different role. Turn off power before handling wires. If the conductors remain unclear, leave them untouched and arrange an electrician’s assessment.
Do smart switches require a neutral wire, and what are the alternatives if none is present?
Some smart switches require neutral, while others are designed for boxes without it. If the wall box lacks neutral, select a device intended for that wiring arrangement and check its instructions against the circuit. Don’t connect equipment that requires neutral without the specified conductor, and don’t use ground as a replacement. An electrician can assess the box if you can’t identify its conductors.
What tools and steps are needed to install a single-pole smart light switch safely?
Use the switch’s instructions, suitable hand tools, wire connectors, and a non-contact voltage tester. First isolate power at the fuse box. Keep the circuit off while the wiring is assessed and the device is connected according to its diagram. Secure connections with suitable connectors, then restore power for testing. If the conductors don’t match the instructions or the switch fails, stop and call an electrician.
How do you wire a smart switch for a 3-way circuit with two switch locations?
Choose a smart switch specifically compatible with a two-location circuit, then follow its model-specific wiring diagram. Multi-location wiring methods vary, so don’t copy a single-pole connection or assume conductors have the same function at both boxes. Isolate power before work. If the existing arrangement or device diagram is unclear, have an electrician identify the circuit and complete the installation safely.
What electrical code and permit rules apply to smart switch installation in Ontario?
Ontario installations must account for applicable Electrical Safety Code provisions. Relevant rules include 2-022 for approved equipment, 2-024 for equipment approval requirements, and 2-034 for equipment use. Rules 2-005 and 2-004 address notification requirements and the ESA process. Other provisions cover control locations, boxes, conductors, overcurrent protection, switches, and bonding. The applicable process depends on the installation scope, so don’t assume every replacement has identical notification requirements.